Using the Airbyte Operator to orchestrate Airbyte OSS
Airbyte is an official community provider for the Apache Airflow project. The Airbyte operator allows you to trigger Airbyte OSS synchronization jobs from Apache Airflow, and this article will walk through configuring your Airflow DAG to do so.
For historic reasons, the Airbyte operator is designed to work with the internal Config API rather than the newer Airbyte API and is therefore not intended or designed for orchstrating Airbyte Cloud. As an alternative, it is possible to make use of Airflow's HTTP operators with both Airbyte OSS and Airbyte Cloud. This approach is described in Using the new Airbyte API to orchestrate Airbyte Cloud with Airflow.
The Airbyte Provider documentation on Airflow project can be found here.
1. Set up the tools
First, make sure you have Docker installed. (We'll be using the docker-compose command, so your install should contain docker-compose.)
Start Airbyte
If this is your first time using Airbyte, we suggest going through our Basic Tutorial. This tutorial will use the Connection set up in the basic tutorial.
For the purposes of this tutorial, set your Connection's sync frequency to manual. Airflow will be responsible for manually triggering the Airbyte job.
Start Apache Airflow
If you don't have an Airflow instance, we recommend following this guide to set one up. Additionally, you will need to install the apache-airflow-providers-airbyte package to use Airbyte Operator on Apache Airflow. You can read more about it here
2. Create a DAG in Apache Airflow to trigger your Airbyte job
Create an Airbyte connection in Apache Airflow
Once Airflow starts, navigate to Airflow's Connections page as seen below. The Airflow UI can be accessed at http://localhost:8080/.
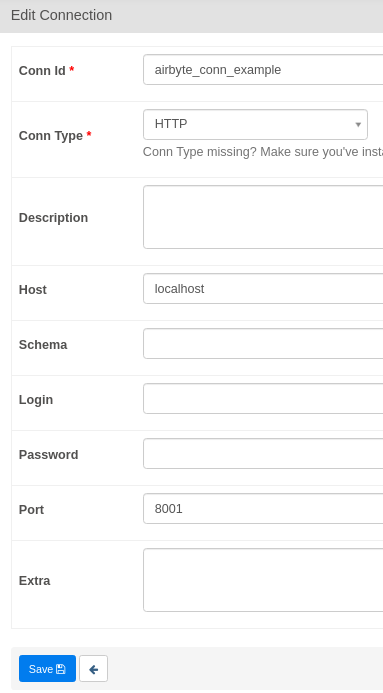
Airflow will use the Airbyte API to execute our actions. The Airbyte API uses HTTP, so we'll need to create a HTTP Connection. Airbyte is typically hosted at localhost:8001. Configure Airflow's HTTP connection accordingly - we've provided a screenshot example.

Don't forget to click save!
Retrieving the Airbyte Connection ID
We'll need the Airbyte Connection ID so our Airflow DAG knows which Airbyte Connection to trigger.

This ID can be seen in the URL on the connection page in the Airbyte UI. The Airbyte UI can be accessed at localhost:8000.
Creating a simple Airflow DAG to run an Airbyte Sync Job
Place the following file inside the /dags directory. Name this file dag_airbyte_example.py.
from airflow import DAG
from airflow.utils.dates import days_ago
from airflow.providers.airbyte.operators.airbyte import AirbyteTriggerSyncOperator

with DAG(dag_id='trigger_airbyte_job_example',
         default_args={'owner': 'airflow'},
         schedule_interval='@daily',
         start_date=days_ago(1)
    ) as dag:

    money_to_json = AirbyteTriggerSyncOperator(
        task_id='airbyte_money_json_example',
        airbyte_conn_id='airbyte_conn_example',
        connection_id='1e3b5a72-7bfd-4808-a13c-204505490110',
        asynchronous=False,
        timeout=3600,
        wait_seconds=3
    )
The Airbyte Airflow Operator accepts the following parameters:
airbyte_conn_id: Name of the Airflow HTTP Connection pointing at the Airbyte API. Tells Airflow where the Airbyte API is located.connection_id: The ID of the Airbyte Connection to be triggered by Airflow.asynchronous: Determines how the Airbyte Operator executes. When true, Airflow will monitor the Airbyte Job using an AirbyteJobSensor. Default value isfalse.timeout: Maximum time Airflow will wait for the Airbyte job to complete. Only valid whenasynchronous=False. Default value is3600seconds.wait_seconds: The amount of time to wait between checks. Only valid whenasynchronous=False. Default value is3seconds.
This code will produce the following simple DAG in the Airbyte UI:
Our DAG will show up in the Airflow UI shortly after we place our DAG file, and be automatically triggered shortly after.
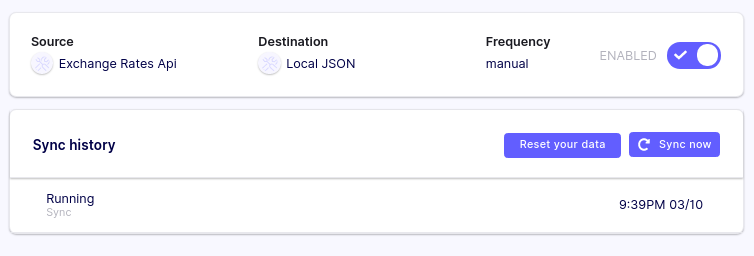
Check Airbyte UI's Sync History tab to see if the job started syncing!

Using the asynchronous parameter
If your Airflow instance has limited resources and/or is under load, setting the asynchronous=True can help. Sensors do not occupy an Airflow worker slot, so this is helps reduce Airflow load.
from airflow import DAG
from airflow.utils.dates import days_ago
from airflow.providers.airbyte.operators.airbyte import AirbyteTriggerSyncOperator
from airflow.providers.airbyte.sensors.airbyte import AirbyteJobSensor

with DAG(dag_id='airbyte_trigger_job_example_async',
         default_args={'owner': 'airflow'},
         schedule_interval='@daily',
         start_date=days_ago(1)
    ) as dag:

    async_money_to_json = AirbyteTriggerSyncOperator(
        task_id='airbyte_async_money_json_example',
        airbyte_conn_id='airbyte_conn_example',
        connection_id='1e3b5a72-7bfd-4808-a13c-204505490110',
        asynchronous=True,
    )

    airbyte_sensor = AirbyteJobSensor(
        task_id='airbyte_sensor_money_json_example',
        airbyte_conn_id='airbyte_conn_example',
        airbyte_job_id=async_money_to_json.output
    )

    async_money_to_json >> airbyte_sensor
That's it!
Don't be fooled by our simple example of only one Airflow task. Airbyte is a powerful data integration platform supporting many sources and destinations. The Airbyte Airflow Operator means Airbyte can now be easily used with the Airflow ecosystem - give it a shot!
We love to hear any questions or feedback on our Slack. We're still in alpha, so if you see any rough edges or want to request a connector, feel free to create an issue on our Github or thumbs up an existing issue.
Related articles and guides
For additional information about using the Airflow and Airbyte together, see the following:
- Using the new Airbyte API to orchestrate Airbyte Cloud with Airflow
- A step-by-step guide to setting up and configuring Airbyte and Airflow to work together
- Build an e-commerce Analytics Stack with Airbyte, dbt, Airflow (ADA) and BigQuery
- The difference between Airbyte and Airflow
- ETL Pipelines with Airflow: the Good, the Bad and the Ugly
- Automate your Data Scraping with Apache Airflow and Beautiful Soup